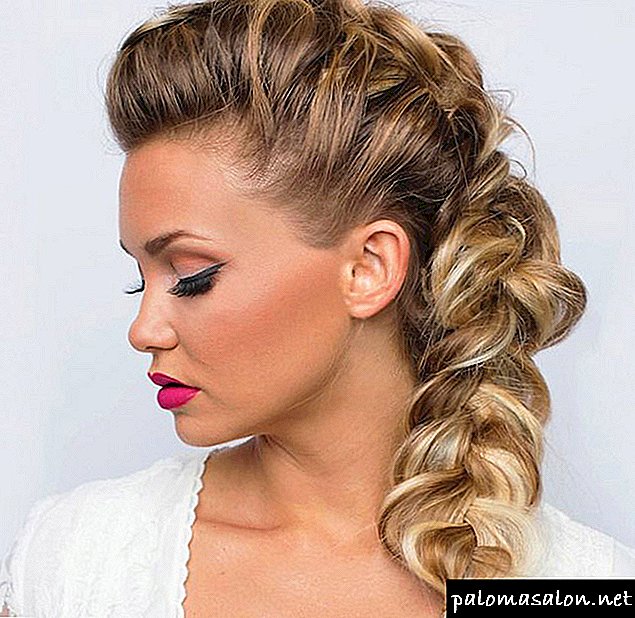
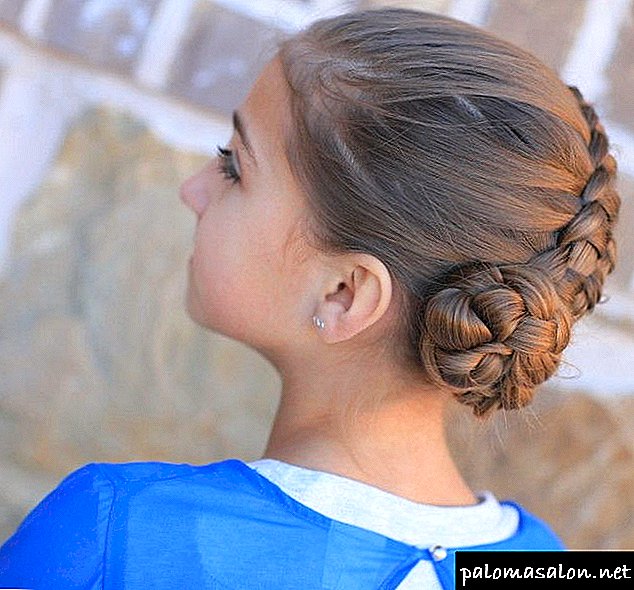
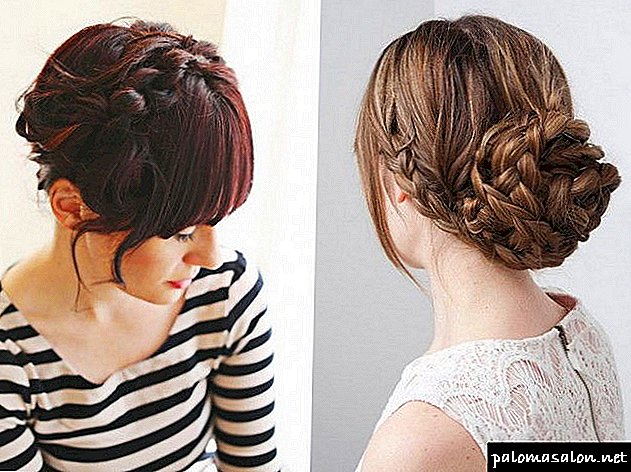
Air weaving on medium hair is ideal for holidays and celebrations. It looks especially impressive on the straightened strands. This braid can easily braid itself. You will see that you will spend no more than 5-10 minutes on its creation! And it looks very unusual and beautiful.
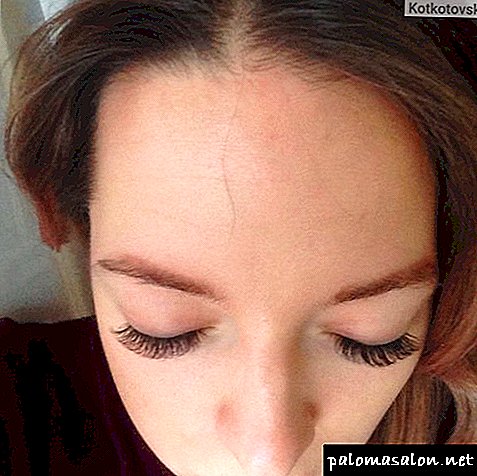
1. Thoroughly comb the hair at the roots. Comb it all back and smooth the upper layer. At the forehead, wear three thin locks.
2. Begin to braid the usual three-strand pigtail.
3. Having made 1-2 props, change the technique - turn the strands underneath and pick up loose curls from one side or the other. It will turn out the French Spit around.
4. Dolelet to the end and tie a rubber band.

5. Starting from the tips and moving up to the forehead, stretch the outer sections with your hands as much as possible.
6. Secure the result with varnish.

Corrugated tail
This amazingly beautiful weaving for long hair impresses with simplicity - everyone will be able to cope with it! With such a gorgeous haircut, you can go "to the feast and the world", and you can go to work.
1. Carefully comb and side parting.
2. Walk through the hair with forceps with a corrugation nozzle.
3. Divide the hair into four sections - top, 2 temporal and occipital. For convenience, pinch each into a clip.
4. Start weaving from the left temporal part. Divide it in half and braid two tight spikelets, picking up loose curls from one side to the other. Fix the tips of the ears with a clip.
5. From the right temporal part also braid two very tight spikelets. They will fulfill the role of clipped temples. Tips also secure with clamps.

6. Release the center part of the hair from the clamp. Divide it into three and begin to braid a free spikelet, without tightening the strands.
7. When you reach the level of the side sections, release the four first pigtails from the clips and gradually weave them into the central large braid.
8. From the base of the neck to the ends of the weave continue in the technique of "fishtail".
9. Tie the tip with a thin rubber band.
10. Gently stretch the extreme slices of the pigtail with your hands to give it volume.

11. If desired, lay the braid in a bundle, slightly shifting it to one side. Pin it down with studs.

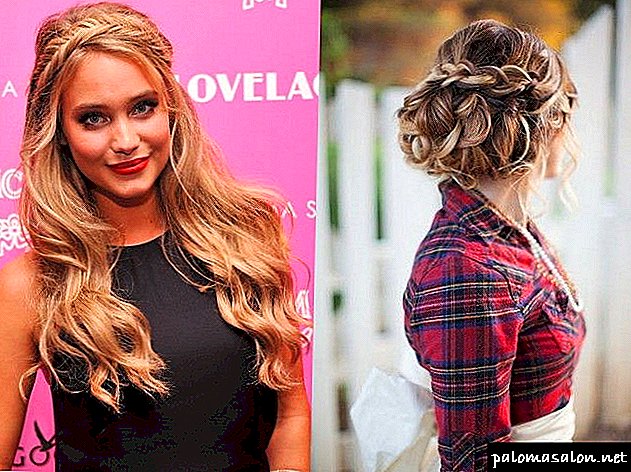
Spit Spike
How to braid volumetric braid? It's 10 minutes! No one would even think that you managed to make this stylish masterpiece yourself!
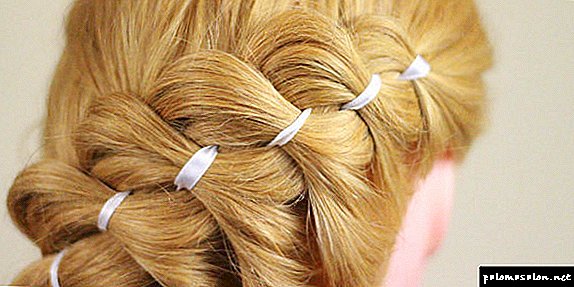
To create a volumetric braid, it is not necessary to possess complex techniques or special skills. This lightweight weave with elastic bands is available even for beginners.
1. Tie a high tail.
2. Wrap the elastic in a thin curl and stab the tip of it with an invisible one.
3. Take along the edges of two not very thick strands.
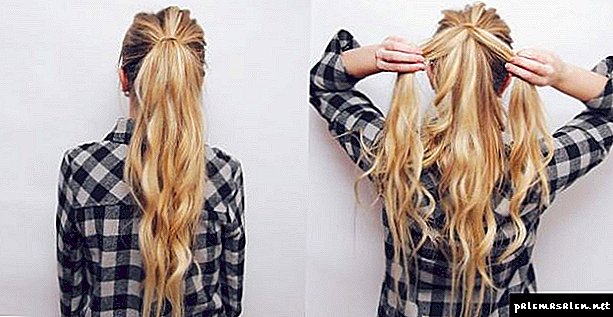
4. Connect them in the middle and intercept a thin rubber band to match the color of the hair.
5. Immediately under this tail, take two more curls. Connect them a little lower and also intercept.

6. Continue weaving to the tips.

7. Stretch the finished braid by the edges, giving it volume.


Lesson one - the crown
If you already know how to braid a braid, then, for sure, you were interested in how to put it in an original way. Here is one of the options.

What you need: brush, comb with a thin tip, a bottle with a spray, 2 thin hair ties, varnish - on request.
Weaving time: 5-8 minutes
Level of difficulty: average
1. Comb your hair and make sure that there are no knots on them, and the curls lie exactly.
2. Separate a part of the hair in the center (move from the crown, in a circle) and secure it with an elastic band (the thinner the gum, the neater the hairstyle is). This will be part A.
3. As a result, you should have a “band” of hair about 5 cm wide. This will be part B.
4. Assemble the hair of part A into the ponytail and allow it to fall freely. If any strands hang over the face - do not remove them.
5. Take strands from the left ear from part B and begin to weave a French braid out of them. When you put your hair on top, grab a strand from part A. During the weaving of the underside, add hair from part B. Try to keep the braid clearly along the border between the parts - this will help to visually hide it.
6. Continue weaving as in step 5, placing the braid along the head, until you reach the base of the pigtail.
7. Weave the remaining hair into a simple braid and secure with a rubber band.
8. Now take the tip of a simple braid and turn it inside the crown to hide it. Make sure the pigtail holds tight. If you did everything correctly, there will be a feeling of a hairstyle, which has no end, no beginning.
9. The tips of the French braid fix stealth.


Video lesson
Lesson two - volume braid
Weaving a braid on long hair requires some patience, but it is rewarded handsomely. Owners of such a scythe constantly hear compliments.

What you need: brush, comb with a thin tip, a bottle with a spray, 1 thin scrunchy, lacquer - on request.
Weaving time: 5-8 minutes
Level of difficulty: average
1. Comb your hair. Comb the strands in the direction where the braid will be (in the video, the hair is combed back, but the side volumetric braid also looks great).
2. Take all the hair and divide it into three strands. Make the first “stitch” of the usual braid.
3. After the first weave, at the edges you need to release the strands (take the most distant strand on the left, remove part of the hair from above and shift it forward. If you are braiding someone, take a hairpin, ask the model to hold the strands or grab the tip of the hair with your teeth). To make it more beautiful, grab wider strands at the base and narrower - closer to the end of the tail.
4. Now lay the side strand in the center, continuing to weave the classic braid.
5. Repeat step # 3 with the rightmost strand, then lay the remaining strand in the center.
6. Repeat the weaving with the release of strands, alternating the right and left side until the hair runs out.
7. Secure the design with an elastic band. On the sides of the spit you will remain symmetrical free strands.
8. Now take the two free strands on the left (from the top) and one on the right (also the top).
9. Start weaving a Danish braid out of them. When you need to add new strands, use the remaining loose hair on both sides of the classic braid.
10. Finish weaving, as in a regular braid (the last 2-3 "stitch").
11. Then remove the gum from the first braid and fix the ends of both the resulting braids with it.
12. In the finished construction, the braids should lie one on top of the other.
13. To make the Danish braid more likeable, you can slightly stretch the side strands (especially the bottom). So the hairstyle will look even more voluminous.
Video lesson
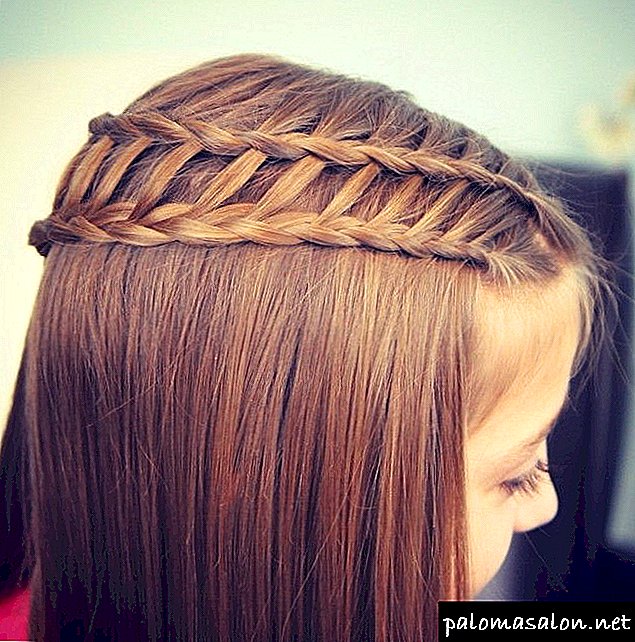
Part One: Spit Waterfall
What you need: brush, hairbrush with a thin tip, 1 scrunchy
Weaving time: 5 minutes
Level of difficulty: average
If weaving braids for long hair while you could hardly, then this lesson will help you cope with the task.

1. Take a small strand at the center of the forehead and divide it into three parts.
2. Begin to weave a regular braid, make one stitch.
3. Now add a little hair only to the top strand (here the secret is that, unlike the French and Danish braids, the hair is added not to both strands, but only to one).
4. Once you have folded your hair, intertwine the enlarged strand from the middle one.
5. After you have crossed the strands, remove the hair from the enlarged bit and direct it down. So you release the "stream" of the waterfall.
6. Continue adding hair to the top strand and lowering it after you cross it with the middle one. Move along the head circumference.
7. When you find yourself at the opposite ear, dock the braid in a classic manner and secure the end with an elastic band.


Part two: lace braid
What you need: brush, comb with a thin tip, 2 scrunchy
Weaving time: 5-8 minutes
Level of difficulty: average
To get started, you will need a ready-made spit-waterfall (see instructions above).
1. Take the first five strands released down and shift them to the other side of the head. They are useful for the second pigtails.
2. Approximately one and a half of the finger below, start weaving: take a small amount of hair and make one “stitch” of the classic braid.
3. Now add strands that we put aside. So get a lace. Make sure that these were strands from the first "waterfall".
4. Continue weaving by adding a small amount of hair from the “streams” of the first braid to the upper strand.
5. Try to move 1-1.5 fingers away from each other around the entire circumference of the head of the scythe - the lace effect will be better seen.
6. When you reach the opposite ear, begin to weave a regular braid.
7. Secure with a rubber band.
Well, you got an unusual, two-level "waterfall"!

Video lesson
Lesson Four - Reverse "Spikelet"
Anyone who has ever been interested in weaving braids on medium hair or long curls, knows that the usual "spike" has a V-shape. And our original “spike” will be turned in the opposite direction, which will undoubtedly attract attention to you.

What you need: brush, comb with a thin tip, a bottle with a spray, 1 thin scrunchy, 1 wide scrunchy, lacquer, hairpins - on request
Weaving time: 5-8 minutes
Level of difficulty: Average
1. First you need to comb all the hair in a high horse's tail or where our “spike” will start from. Fasten with a wide elastic band for hair (before you collect hair, you can sprinkle it with water to make the tail look smooth).
2. Divide the tail into 2 equal parts.
3. Take a small strand on the outside of the right side, and draw under the right half. At the same time, take a small strand from the outer side of the left part, swipe under the left half and cross it with the right strand (in the usual "spikelet" strands are held above the halves of the tail).
4. Repeat step # 3 until the hair runs out.
5. Secure the end of the pigtail with a thin rubber band.
6. Stretch the side strands to the sides, so that the braid will become more voluminous.
7. If you want, fasten a hairpin over a thin elastic band.

Video lesson
Lesson five - the heart of the braids

What you need: a brush, a comb with a thin tip, a bottle with an atomizer, 2 thin hair ties, 2-4 stealth, a varnish, a ribbon or a bow - at will
Weaving time: 5-7 minutes
Level of difficulty: plain
1. After you comb your hair, divide the curls into upper and lower parts.
2. Now split the top half in half. So at your disposal will be 3 parts: two at the top and one at the bottom.
3. Gather the hair of one of the upper parts and begin to weave a simple braid. Try to keep as close as possible to the parting. Secure the tip of the braid with a rubber band.
4. Repeat step # 3 for the second top.
5. Now take the right braid and wrap it around its axis to make a loop. Secure this eyelet stealth.
6. Repeat step # 5 for the left spit.
7. Now connect the tips of the braids together. You must have a heart.
8. Remove the rubber bands from both ends and fasten them together with one rubber band.
9. Sprinkle hair with lacquer. If you want, you can decorate it with a ribbon or a beautiful bow.
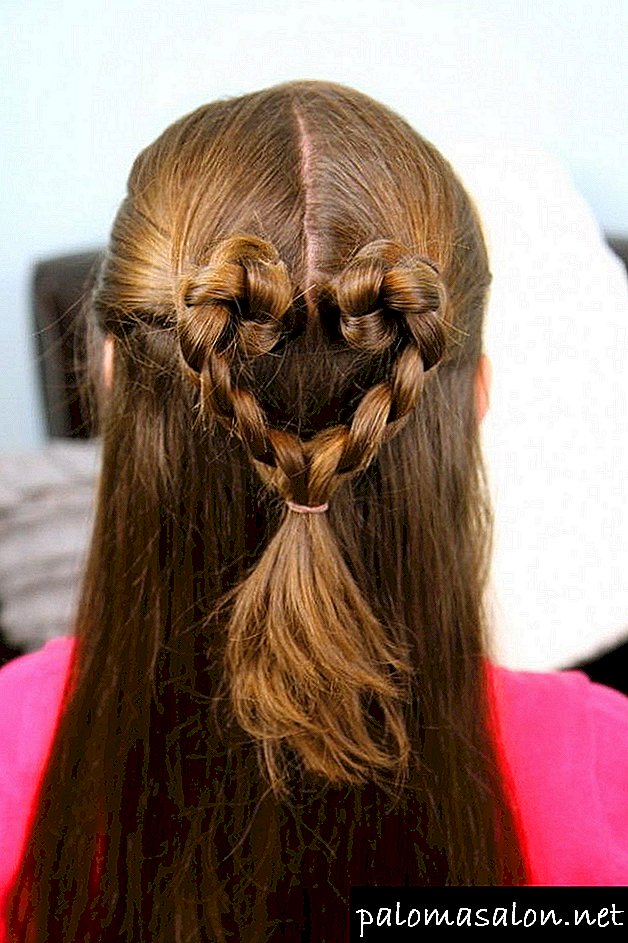

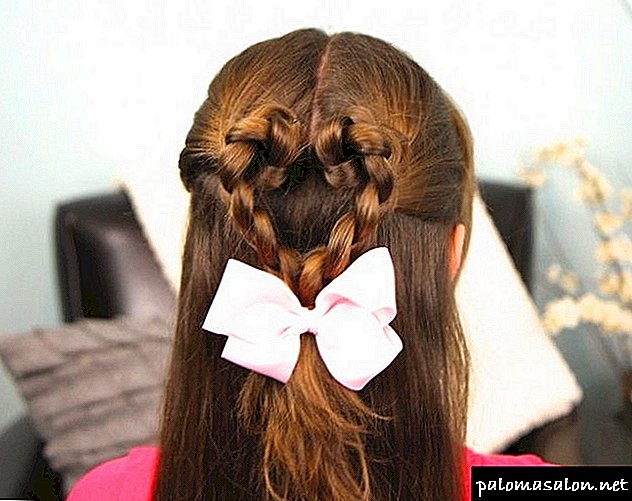
So the question was resolved how to braid beautiful braids for medium hair (and for long hair too) for Valentine's Day!
Video lesson
Lesson six - flower from braids

What you need: brush, comb with a thin tip, a bottle with a spray, 3 thin hair ties, 2-3 stealth, varnish - on request
Weaving time: 5-8 minutes
Level of difficulty: tall
1. Part on the center
2. Braid on a thin classical braid on both sides of the head and secure their tips with rubber bands. The length of the braids should be such that they "reached" to the head. So the hairstyle is suitable for those who are mastering braid weaving on medium hair.
3. Connect both braids to the nape and fasten them with another rubber band.
4. Now lightly press the braids to the head, and then stretch their tips in different directions.
5. Take a comb and gently lift the hair over the pigtails to create a volume effect.
6. Remove the rubber bands from both tips of the braids, unravel all that is below the “common” rubber band and braid one classical braid from the released strands.
7. As soon as the braid is ready, on the one hand, gently pull the strands to the side. These loops will become flower petals.
8. Secure the braid with a rubber band.
9. If you stretched the left side of the braid, begin to twist it counterclockwise, wrapping around the elastic in a spiral (cochlea). If you stretch the right side, then your snail will twist counterclockwise.
10. Wrap your hair around the elastic again and again. Spit loops will form a flower.
11. When the design is ready, take a few stealth and gently fix the flower. Make sure the rubber bands are not visible.

Video lesson
Weave braids (schemes)


Hair braids photos


We hope that now you understand that weaving braids is not such a difficult thing as it might seem at first glance. The schemes that we have collected in the lessons differ from the standard set of braids, so that you can always emphasize your individuality.
Braid braid step by step photos: varieties
Spit is not only one of the most feminine, but also practical hairstyles. With braided hair, you can safely pass through the whole day, without fear that they will become numb. Moreover, this hairstyle is quite versatile and looks natural and harmonious both in a business setting and at a youth party.
 Luxurious braid of harnesses
  Romantic Spit Waterfall
French braid braided around the head
There are several main types of braid weaving:
- classic russian,
- European: Swiss, Greek, English, Dutch and famous French weaving,
- Eastern: plaits (side braids), ropes, threads, braids, zizi, curls, rasta, etc., the last three types can be used for short hair,
- designer: “French waterfall”, braids from knots, Lino Rousseau, “basket”, “dragonling”, “fishtail”, “eight”, etc.
The best way to learn any of the techniques is to watch video tutorials on this topic or study photos of step-by-step braid weaving. And for any of these weaves, you can use not only your own hair, but also overhead strands or hairpieces. Their color can be either combined with your own hair color or contrasted with it: the main thing is not to use more than three colors at the same time.
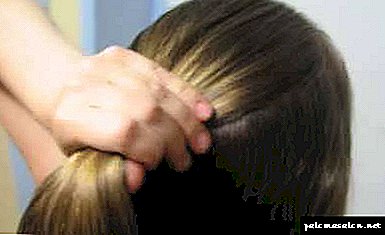
 How to braid a ponytail with a scythe
  How to braid a ponytail with a scythe. Step 1
  How to braid a ponytail with a scythe. Step 2
Tip!Recently, the so-called careless styling, which can be used with any kind of weaving, has become very popular. But even in this case, the strands must be evenly stretched and not out of the general style. Otherwise, the hairstyle will look just sloppy.
Classic braids
The traditional Russian braid has long been a frequent guest on many famous catwalks: the Valentino fashion house, theatrical shows of Victor & Rolf, Emerson, etc. more braid However, it is easy to master even such complex types of braiding by using step-by-step photos.
 How to braid a high hair out of braids. Step 1-2
 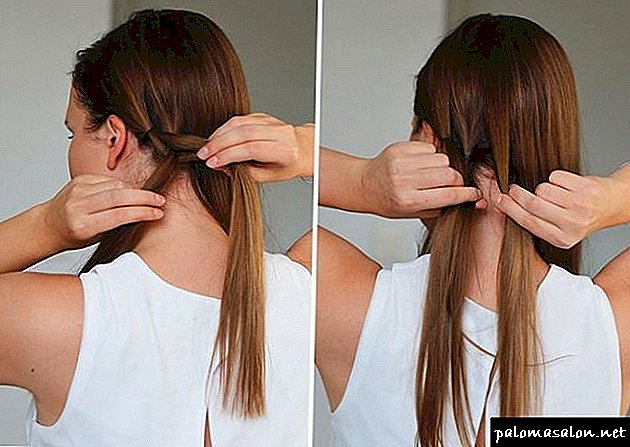 How to braid a high hair out of braids. Step 3-4
 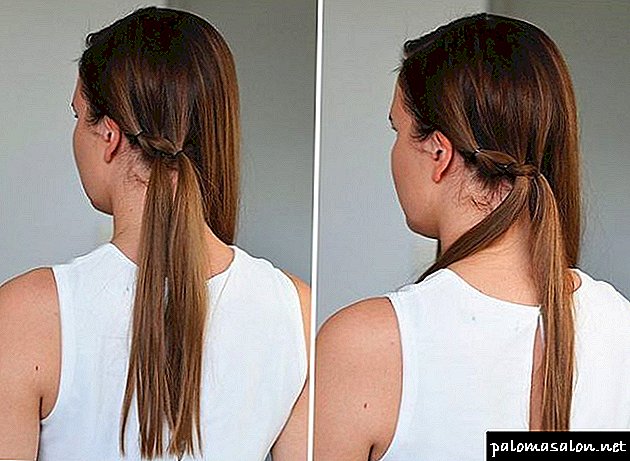 How to braid a high hair out of braids. Step 5-6
  How to braid a high hair out of braids. Step 7-8
  How to braid a high hair out of braids. Step 9-10
The traditional Russian braid consists of three equal strands that are intertwined alternately. It can be not only smooth, but also voluminous, slightly disheveled, multicolor, asymmetric or used in combination with other types of hairstyles. Hair can be divided into straight or oblique asymmetrical parting or not at all parting. Weaving can also vary the density of weaving and the number of strands used.
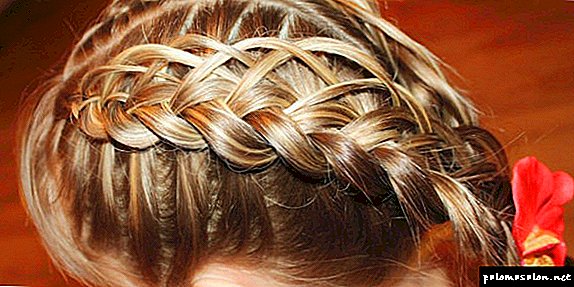
One of the varieties of Russian braids is weaving "spike": a technique that allows you to achieve the volume and pomp of hair. In this case, only two strands are used with the sequential addition of new ones. The order of their addition may be different. However, for the hairstyle to look neat, the density of each new added strand must be the same.
 Hairstyle with a scythe in the Greek style
  Hairstyle with a scythe in the Greek style. Step 1-4
  Hairstyle with a scythe in the Greek style. Step 5-8
Tip!Perfectly smooth braids look unnecessarily strictly, so it is worthwhile to allow individual strands to slightly break out.
Straight from Europe
Designers distinguish several variants of weaving that came to us from Europe:
- Swiss braid: woven according to the principle of Russian, but before that, each of the strands is twisted into a tight braid, due to which the hairstyle looks more voluminous, such weaving perfectly combines with any style and looks great both with jeans or an open summer dress, and with a business or cocktail suit, step-by-step weaving of such braids on medium hair or hair of maximum length can be seen below,
- French weaving: in contrast to the “spikelet”, the strands are interweaved not one over the other, but placed inside, the spit begins with a small bundle divided into 3 main strands, gradually adding 2–3 cm more so that at the end of the weaving will be collected all hair, strands can be taken both from one or both sides, weaving can be straight (to yourself) or reverse (from you), start from the top of the head or go through the whole head in the shape of a wreath,
 French braid bezel
 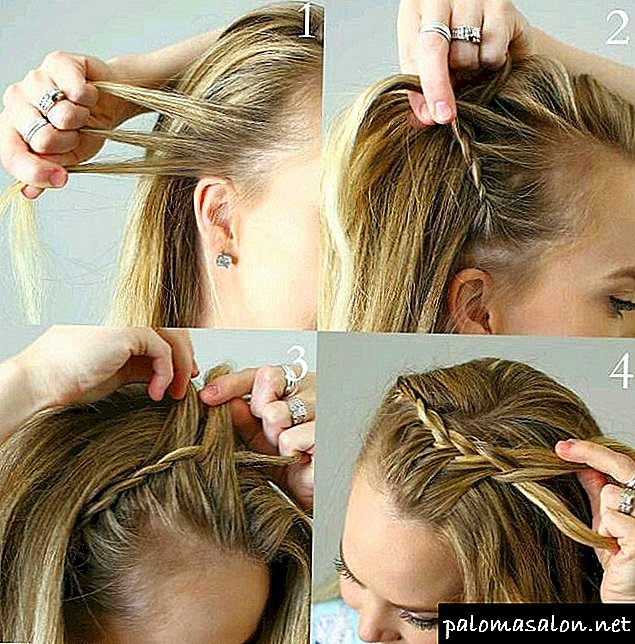 Bezel from the French braid. Step 1-4
  Bezel from the French braid. Step 5-8
 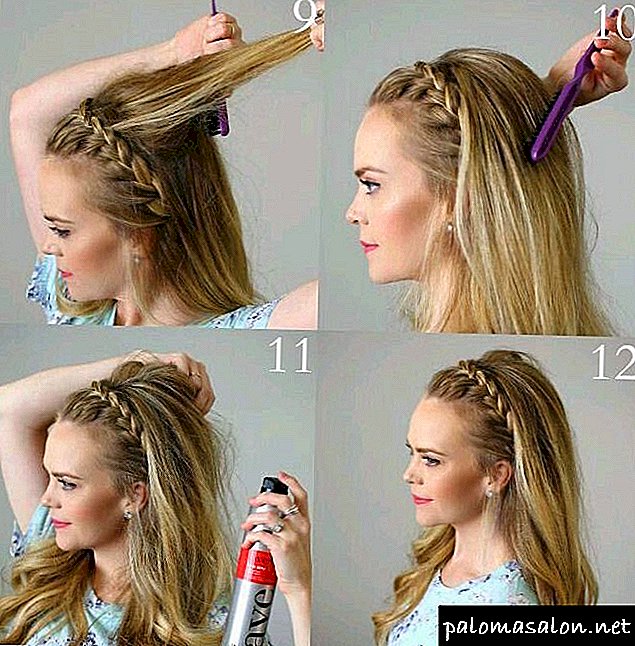 Bezel from the French braid. Step 9-12
 - English: its only difference from the Russian version is that weaving begins with a horse tail, fixed at the back of the head or closer to the crown, such braid weaving for long hair is shown in a step-by-step photo,
- Dutch: spit "inside out", woven strands do not hide inside the hair, but rise above it,
- Greek: a combination of smooth hair and a braid, which resembles a bezel that runs all over the head, three small strands are taken closer to the parting, the rest of the hair is slaughtered for a while, small locks are gradually added around the circle, with the help of which such bezel is firmly held onto head, braids may be two, in which case they start on two sides of the parting, and then they split at the back of their heads into one.
 Greek hairstyle with a bun and a braid. Step 1-2
 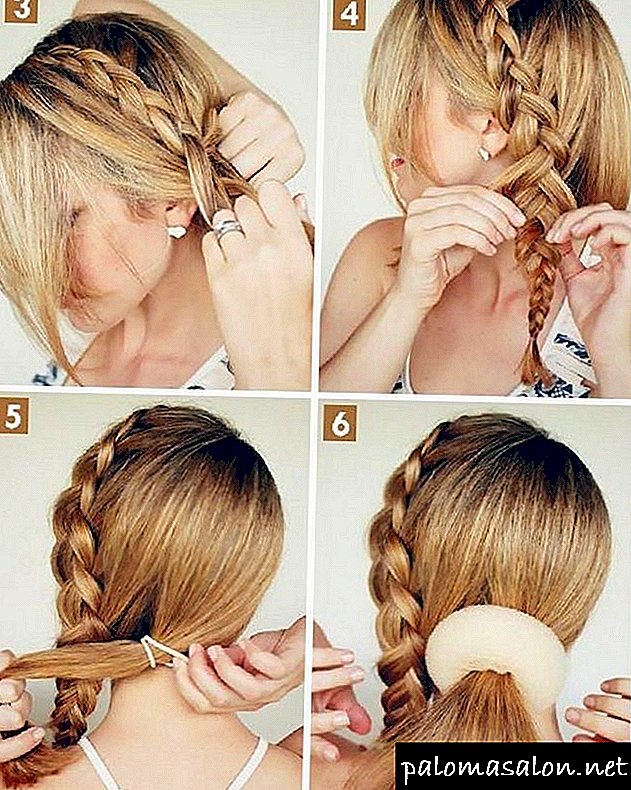 Greek hairstyle with a bun and a braid. Step 3-6
  Greek hairstyle with a bun and a braid. Step 7-8
Tip!Stylists advise before weaving to make a little bouffant at the roots. He will make hair more lush, and hair - more feminine. This technique is especially relevant when creating evening hairstyles.
How to choose a braid?
Even a beautiful and flawlessly executed braid can not go to your face. Therefore, before learning the lessons and patterns of weaving of braids, for beginners we recommend to learn about the types of individuals. To hide your flaws and highlight the benefits, you need to understand which hairstyle suits you best.

On this occasion, it is best to consult with a stylist who has the opportunity to look at you. But we will tell you a little. There are 6 main types of faces: round, oval, square, rectangular, triangular and pear-shaped. Here are some basic tips for them:
- If you are the owner of an oval face, do not worry - any hairstyle will do. You can either create a contrast with one big braid, and evenly cover your head with pigtails,
- Elongated face: avoid long and thin braids that visually stretch it. Your hair should be short
- Square: thin, light and "airy" pigtails soften the face and give it femininity. An asymmetrical hairstyle is perfect for you. Try to put a few braids on the side of the head, without making them on the other. This type is a bit more complicated than the others, and its owners need to study the step-by-step braiding of braids out of hair, which will be slightly lower.
- Round: you can (and need!) Weave thin and long braids that stretch your face. It’s better if they are in the back and not at the sides,
- Triangular: cover your broad forehead with the beginning of a pigtail or bang. At the bottom of the head, the hairstyle should be wider than at the top. Two short pigtails ending at the chin / neck level will help with this. They will also close the protruding cheekbones,
- Pear-shaped: “expand” the upper part of the face. It is easy to make braids running along the crown. In addition, it is desirable to cover the wide cheekbones, temples and ears. Spit on the sides perfectly cope with this.

- Women who want to return hair softness and beauty, you need to know the rules of care for curls.
- To achieve beautiful and healthy hair, you can use castor oil, more in our article.
Spike ordinary
The simplest form, which is also called the "French braid". This pigtail is perfect for everyday wear. It is versatile, unpretentious in the care and suitable for hair of almost any length (except very short). It is from the spikelet that we recommend to start the weaving of braids.
Plait over braid
Simple and original hairstyle, which you will have time to braid, even if somewhere late. It is done on long hair. Suitable for girls wearing curly and wavy hair. Goes to many styles of clothing and to any person.

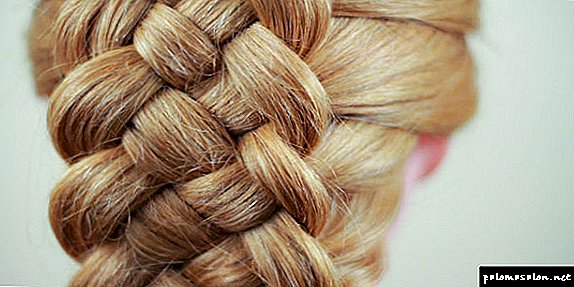
French braid in a volume of 4 strands
Stylish braid, resembling a chain. Occurs often, but because it does not get worse. Harder previous. Grasp the pigtail after we have practiced the simple options. Made from the tail at the crown.
Beautiful flagellum - hairstyle for girls who want to emphasize their style and not spend a lot of time. He weaves easier than many braids and looks great. Approaches to many dresses, it is pertinent both in a usual situation, and on a holiday. It is easy to make, even superficially examining the step-by-step weaving of braids for beginning girls-fashionistas.
Weaving "Ladder"
Another braid, for which you do not need to take master classes from stylists. Refined and light, it looks wonderful on long hair. You can do short, but then to achieve the desired effect you need to have serious skill.
French coils
Original weaving, which exactly will pay attention. It is woven from plaits, not braids. This hairstyle looks decent at any event. The only requirement is long hair, there is no way without them.

Original step by step instructions
- Take a strand from the top of the head, divide into three equal parts. Put the right one on the middle one. On the left, do the same
- Hold all three strands in your left hand, but separate them with your fingers so that they do not tangle,
- From the right side of the head, collect the loose strands and apply on the right strand of the braid. Take the right strand (along with the ones you just applied) and apply it on the middle one. Take the middle one to the right,
- Hold all three strands in your right hand, remembering to separate one from the other,
- From the left side of the head, collect the same strands and put on the left strand of the braid. Take the left strand (along with the superimposed strands) and lay it on the middle strand. Take the middle left,
- Repeat the steps to weave the pigtails from the hair (from the second to the fifth step) until the hair or desire has run out.

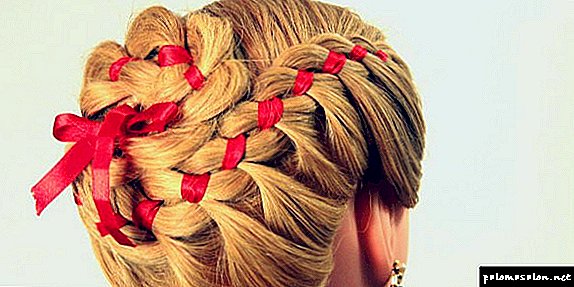
Pigtail with interwoven ribbon
- Choose a ribbon that matches the color of the clothes and at the same time creates a contrast with the hair. It should be much longer than hair
- Prepare:
- styling products (varnish / spray / gel),
- invisible, studs, clips, crabs,
- 1 fine comb with frequent teeth and 1 large comb-brush,
- a set of thin rubber bands.
- Comb, divide hair into 3 parts. Middle tie the end of the tape,
- Lay the 1st strand on the 2nd and pass it under the tape. After put on the 3rd,
- Spend a ribbon under the middle strand, again put it in the middle of the 2nd and 3rd,
- Repeat these simple operations to complete the weaving of the pigtail step by step, then tie the tip with an elastic band and slightly (very carefully) release the links of the pigtail. It will make her more elegant.
Pigtail of five rows
- Comb well, if necessary - treat your hair with styling products,
- Take a fairly thick tail, divide it into five identical curls,
- Put the 1st strand under the 2nd and place the 3rd one on top,
- Do the same on the other side: 5th under 4th and above 3rd.
- Repeat the previous 2 steps to the end.
Rope weaving
- First of all, call someone for help. It is difficult to make this hairstyle for yourself
- Comb carefully, create a tail and secure it with a rubber band,
- Divide the tail into 3 identical strands,
- Stretch the 1st strand and twist it to the left, creating a flagellum. Do the same with the rest
- Wind the left harness around the other two. It’s important to keep them tight,
- When finished, weave the strands and firmly pull off the rubber band.

- If you want to permanently get rid of unwanted body hair, you should sign up for a laser or photo-epilation.
- To look stylish and neat owners of long hair can master the technique of braiding, you can learn more here.
Tips for novice professionals
- Before you start weaving braids for girls, wash your hair, blow-dry and comb your hair thoroughly. Do not forget about styling products! Try to divide the tail into as equal strands as possible - only a well-woven braid of identical parts looks professional.
- After you have learned the basics, try to fill the tip of the braid in different ways - "rosette", for example.
- If symmetrical hairstyles fit the head, evenly cover it with thin braids.
- Braided roller or bezel, formed from braids, woven from the top, will be a great evening and festive hairstyle.
- Elastic bands and hairpins should not bulge. Weave the ribbon in such a way that it does not cover the braid.
- Try to weave braids, starting with different parts of the head. Combine different ways. So you can create something really unusual.
- If you can not weave a chic braid - do not worry. Once again, study the patterns of weaving braids out of hair for beginners and try again. Success is only a share of talent, multiplied by work.

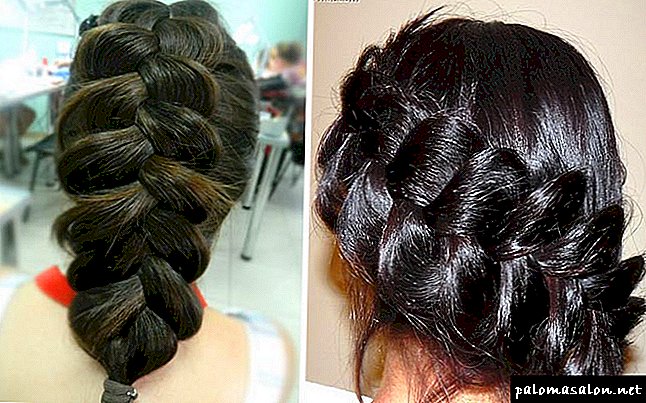
How to weave a volumetric braid: step by step photos
Pigtail can be braided in the center of the head or start weaving from the side. Beautifully pigtail looks, braided diagonally to the side. In general, having mastered this uncomplicated weaving, you can create a lot of beautiful styling, which will be based on a volumetric braid. Here everything depends on imagination, but we can always work out the technique and skill of weaving.
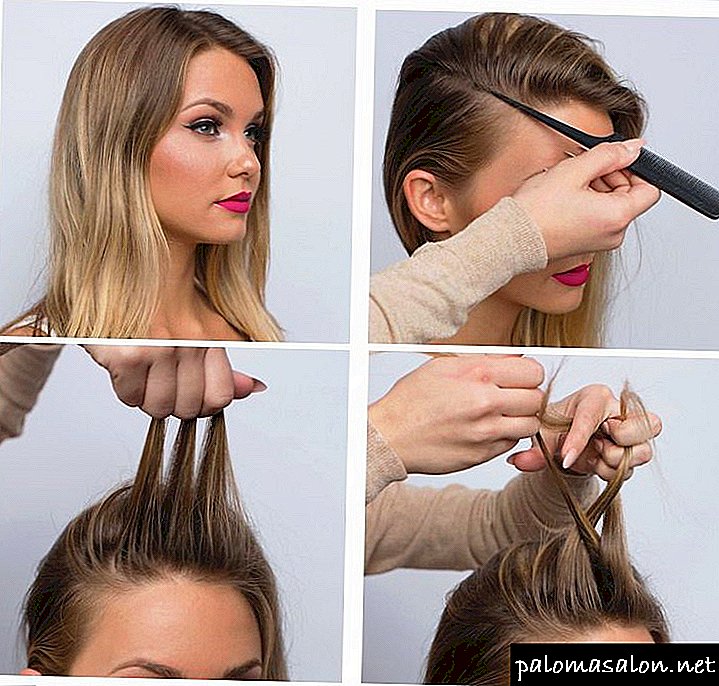
The first step is to separate the wide strand in the place where you want to weave the braid: you need to forehead or over the ear for a side braid. The wide strand is divided into three strands of the same thickness.

Do you know how to weave a simple pigtail of three strands? Start as if you wanted to braid it - the usual braid. Only with one difference - strands are enclosed under the bottom. The extreme strand (No. 1) must be placed under the middle strand (No. 2).
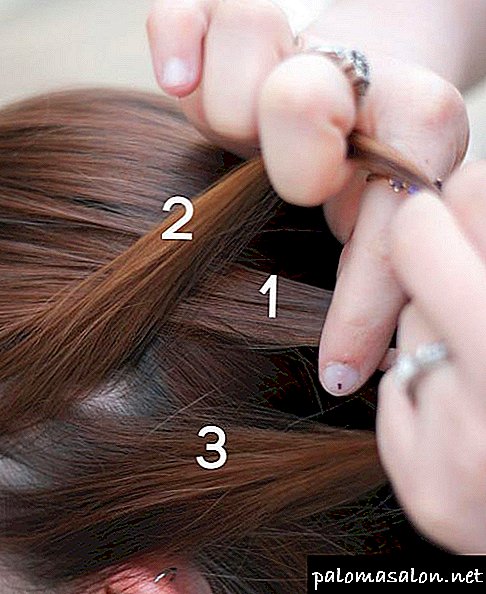
Now the same thing needs to be done with another strand. Place the leftmost strand (# 3) under the middle one through the bottom.

Now you need to braid strands of the total mass of hair on the sides. To do this, add a new thin strand of the total mass of hair on the right and joins the existing extremely right strand.

And already such a double strand needs to be put through the bottom under the middle strand.

Repeat the same on the other side. We take a strand from the total mass of hair on the left, connect it with our extreme left strand and cross it from the middle through the bottom.

We continue, repeating similar actions. We direct weaving on the conceived line.
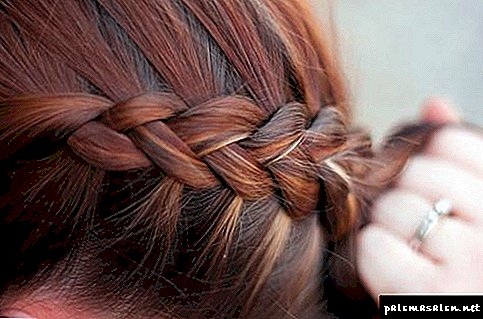
After all the hair will be woven into the braid, you can tie a tail or continue weaving the usual braid, repeating the motif of binding - the extreme strand is enclosed under the middle one through the bottom. The secret of a wide, openwork braid - gently pull two fingers along the edges of the already woven strands, alternately straightening and slightly pulling them out. No need to pull the entire protruding edge, just pull 1/3. That is, the center of the braid should remain strong weaving.

How to weave a volume braid, a French braid on the contrary: photos of hairstyles
On the basis of this weaving beautiful hairstyles are created. A braid can be braided starting from weaving upside-down from the back of the head and ending with a magnificent bundle. It is very convenient and stylish to weave a grown-up bang or face hair into a braid, leaving the rest of the hair loose.


Have you tried to weave yourself a volume braid? Share in the comments!
Oriental tales
A distinctive feature of these hairstyles is the intricate shape and the presence of large, conspicuous jewelry:
- harnesses (Sinhalese braids or screw braids): the hair is divided into two equal strands, each of which is twisted in one direction, then both strands intersect and twist in the opposite direction; .
 Spit-Plait
 - braids-ropes: a side parting is done on the hair, and weaving (twisting two small strands) starts from the side where there is more hair, while passing such a braid around the head new small strands are added, at the back of the head it intersects with the bulk of the hair in the direction opposite to the main weaving,
- afrokosichki (Brady): many small braids, weaving from the head to the temples, they can freely dissolve, create one or several thick braids, make a tail of them, twist them into a shell, etc.
 Afrokos is back in fashion
  African braid weave
  Afro-braids are great for a girl's summer look
  With this hairstyle, it is convenient to send the child to the camp or to the sea
 - zizi: a type of braid, ultra-thin braids made of artificial hair, created using machine weaving, woven into each individual strand of your own hair,
- Curley: the method is similar to zizi, but the curls are twisted into a tight spiral, can be used for building.
With the help of step-by-step photos for beginners weaving braids can be mastered quite quickly. The main thing - patience and utmost attentiveness.
 Zizi weave
  Fashion dreadlocks
Tip!Unravel small braids quite problematic. To facilitate this procedure, before creating the hair, the hair should be thoroughly rinsed with a cleansing shampoo, not usual, and then apply any quality balm on them.
Modern design techniques used in weaving
In recent years, hairstyles from braids have received the most unexpected performance. However, for any design techniques, they are, in fact, improved ethnic variants of the Russian, European and Oriental versions:
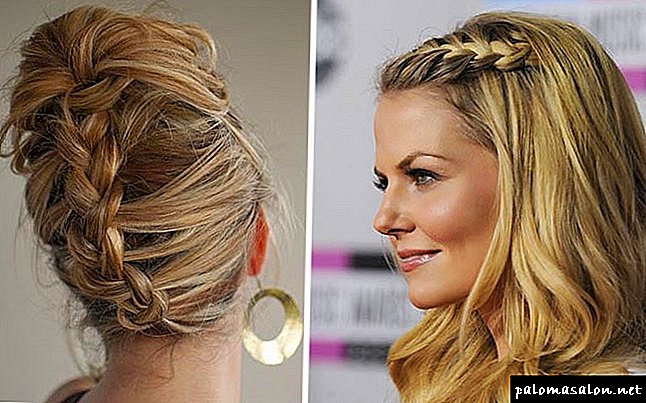
- “French waterfall”: it resembles the usual one or two braids, starting at the temples and ending at the back of the head, but each lower strand is released into “free swimming” and freely falls on its back. The hairstyle can have all sorts of variations: be asymmetrical, go through any part of the head, sag, etc. It can even be used on short hair,
 Spit waterfall
  How to braid braid waterfall. Step 1-4
 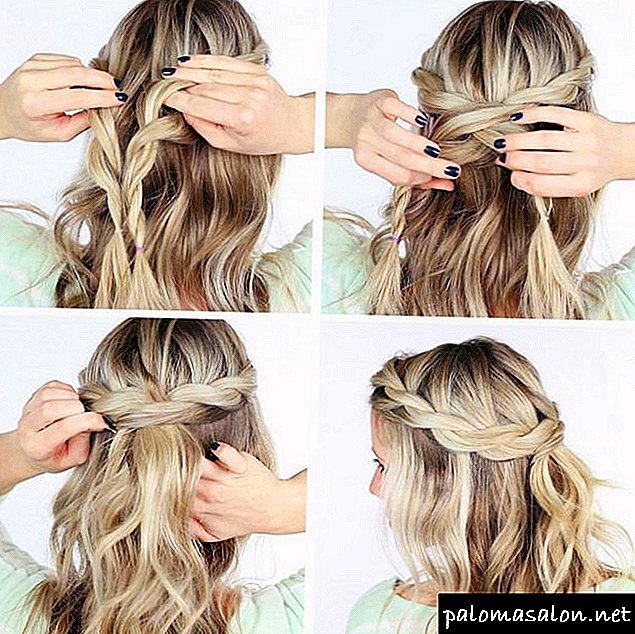 How to braid braid waterfall. Step 5-8
 - braid from knots: two strands are interconnected by means of a series of knots, while it can be woven as part of the hair (one or two small knots are used as a kind of decoration), and their entire volume,
- Lino Rousseau: a combination of nodes and technology "spike". After each knot, new hairs are added to the already selected strands; for such a hairstyle, the hair should be trimmed exactly and be identical along the entire length,
- "Snake": the usual French spit is not located along one line, but wriggles over the entire surface of the head, it can have 2-3 or more turns,
- “Basket”: part of the hair on the top of the head is collected in a high tail, then a regular French braid is woven from the temple with alternate addition of tails from the tail and loose hair,
 Large French Spit
 - weaving "Kornrow": classic Afro-braids are arranged all over the head in the form of a geometric pattern resembling rows of corn (from English corn - corn and row - row), to obtain such a pattern, each miniature braid is woven in the manner of a classic French braid.
Tip!To facilitate weaving when creating hairstyles from braids, you can use any means for styling: foam, varnish or gel.
 French braid, matched up
 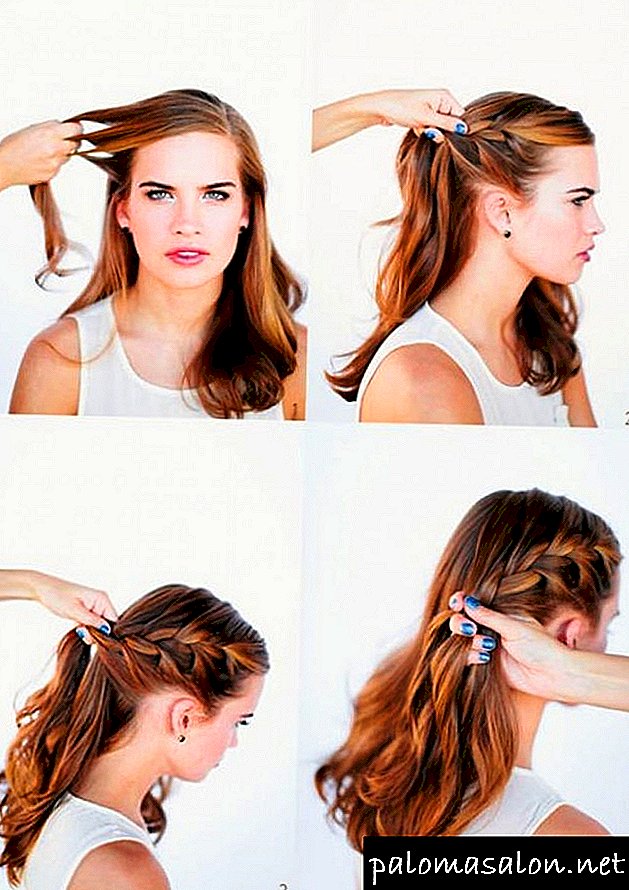 French braid, picked up. Step 1-4
  French braid, picked up. Step 7-8
Short hair weave
Thanks to improved weaving methods and the presence of modern fixation tools, you can decorate yourself with braids even with short hair:
- "Rim": two braids are woven at the temples, and then fastened with hairpins on the back of the head,
- parting from braids: interlacing of side strands located on one or two sides of the face,
- bangs with double braid: the upper part of the face is framed by two small braids,
- pigtail around the head: it can be located in any part of it, pass over the entire head, or is to the left, to the right of the face, or braided only on the back of the head
- "French bangs": long bangs can be removed to the side in the form of a French braid, as in the case of a short haircut, the hairs will invariably hang around the sides, beat the rest of the hair so that it looks as organically as possible,
- combination of punk style and french braid: some curls are combed in the form of a mohawk, side strands are woven.
 Spit around head for short hair
  Spit around your head for short hair. Step 1-2
 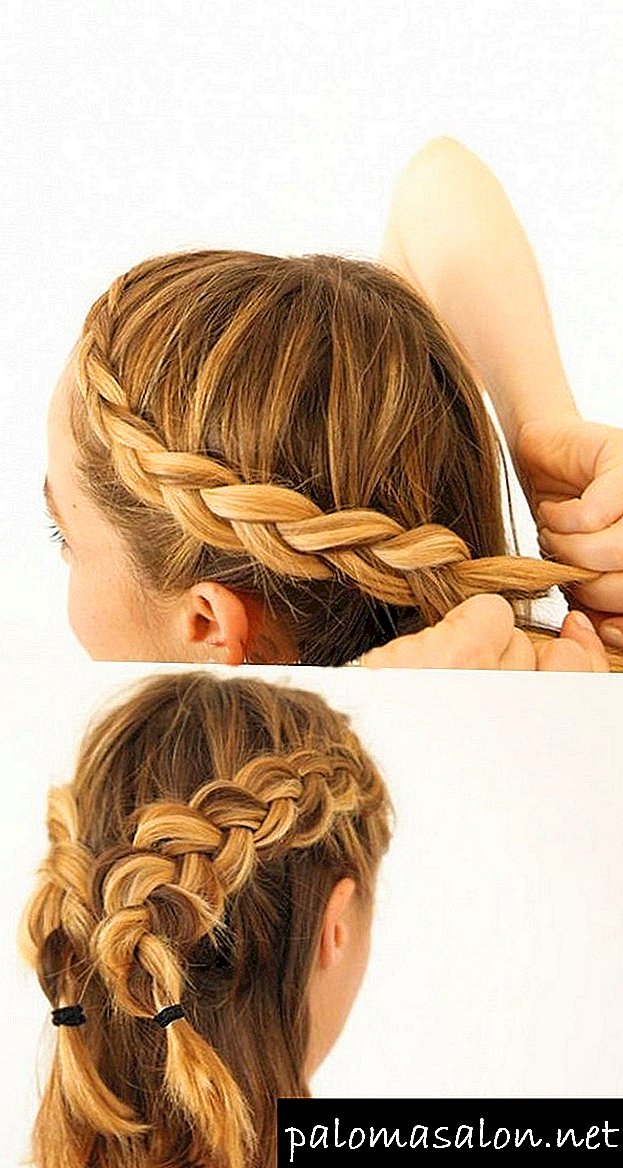 Spit around your head for short hair. Step 3-4
  Spit around your head for short hair. Step 5-6
  Spit around your head for short hair. Step 7-8
Uneven strands left after weaving are best secured with one or more barrettes or rubber bands. Young girls can be woven into the hair with a bright satin ribbon to match the clothes. This ribbon can also be carefully threaded into an already finished hairstyle with the help of a large “Gypsy” needle.
Tip!When weaving two braids, it is important that they remain at the same level (unless, of course, asymmetry is not one of the main elements of the hairstyle).
Who will spit?
Perhaps there is no girl or woman who would not be able to face hair from braids. However, there are several rules that should be followed when choosing a method of weaving:
- girls and women with an oval face can use all kinds of braids,
- in order to visually narrow a narrow face, all hair should not be woven into the hairstyle - a few strands must be gently curled around the cheeks, in such cases it is not necessary to completely open the roots and lift the hair too much, the styling should be as soft and natural as possible.
- a wide face, on the contrary, should be visually lengthened, therefore the braid must be started in the area of the crown, while allowing the face to open completely,
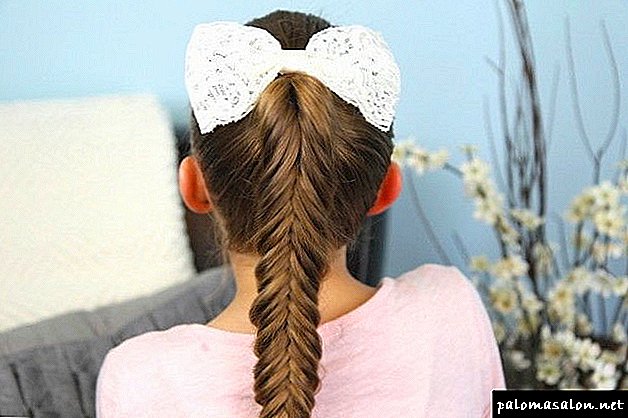
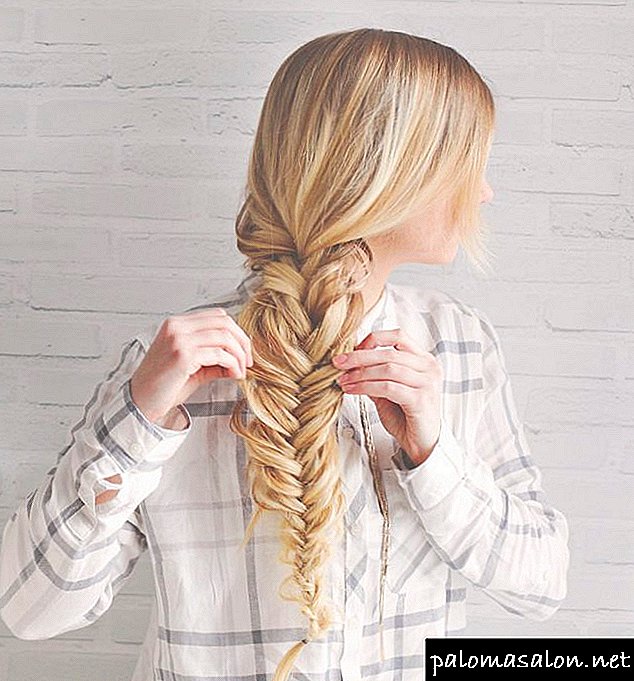 Charming braid fishtail
  How to braid a fishtail braid. Step 1
  How to braid a fishtail braid. Step 2
 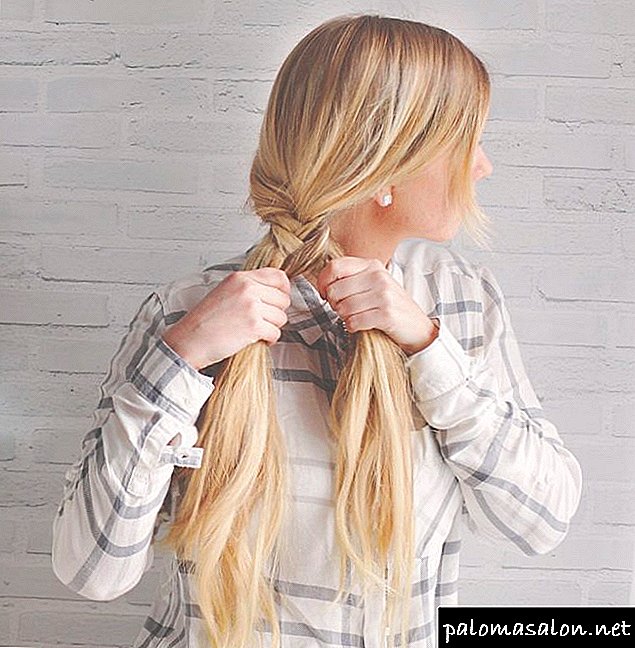 How to braid a fishtail braid. Step 3
 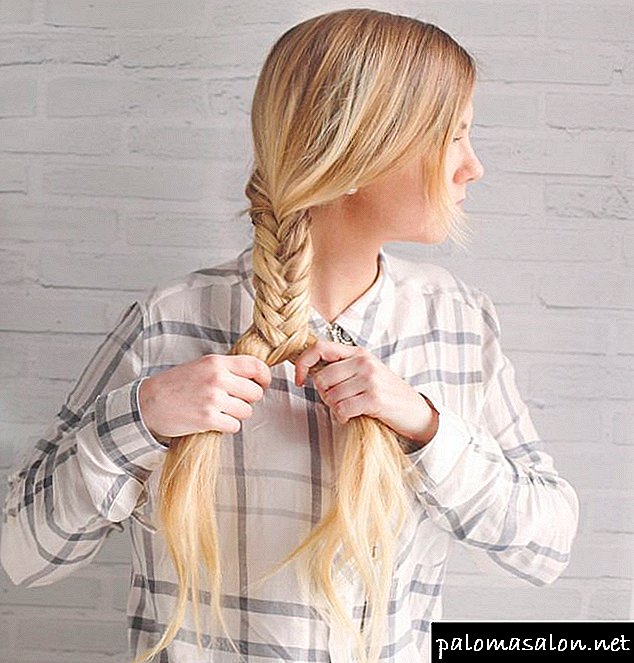 How to braid a fishtail braid. Step 4
 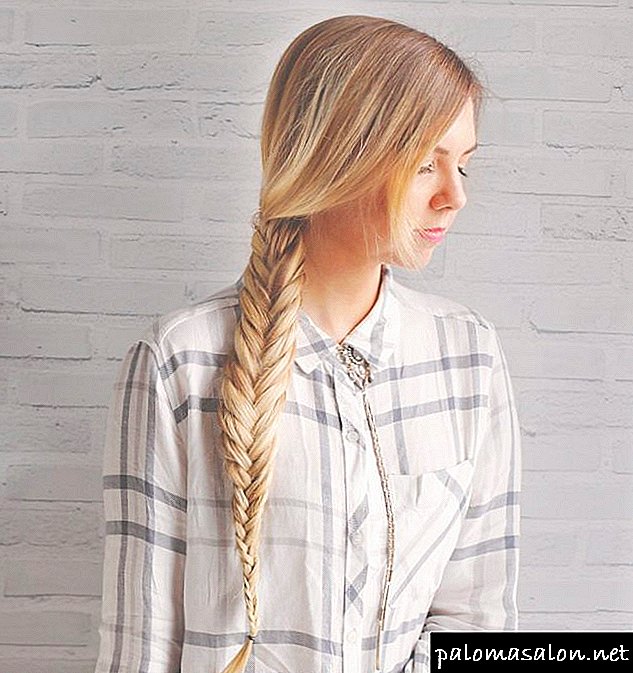 How to braid a fishtail braid. Step 5
 - with a wide forehead and narrow chin (triangular face) it is required to visually give the volume of its lower part, you can do it with the help of a long bang, which is not interwoven into the braid, but asymmetrically located on one of the sides,
- owners of a large rectangular face should be as careful as possible to use small parts and a hairstyle of several thin braids: it is better to decorate it with one or two widest and long braids.
Tip!Any kinds of braids can be decorated with cloth, ribbons, rims, pearl threads, decorative hairpins, rhinestones, brooches, fresh flowers, etc.
For example, you can master weaving braids with ribbons using a step-by-step photo. However, in order for this hairstyle to look harmonious, it must be ideally combined with the chosen style of clothing.